

You can reassemble a pool table yourself if you have at least two capable helpers and the table uses a three-piece slate setup. What separates a table that plays true from one that drains every shot to the same corner is leveling, not muscle. The sequence that works is: square the frame, set the center slate first, add the end pieces, fill the seams, level everything, torque the rails, then stretch the cloth and reattach the pockets. One-piece slate tables, staircases, or tight hallway turns push this from a weekend project into a job for a professional crew.
TL;DR:
- Proper frame squaring and careful leveling at each stage are crucial to ensure the table plays accurately and avoids long-term warping.
- Disassembly requires labeling and removing pockets, rails, felt, and slate with multiple helpers, especially for three-piece slates weighing up to 800 pounds.
- Reassembly begins with a square frame, then sets the center slate as a reference, fills seams with beeswax, and torques rails in a cross pattern for consistent tension.
- Precise measurement and torque of bolts, along with rechecking level after 24 to 48 hours, are essential to prevent uneven play caused by settlement or misalignment.
- Hiring professional movers is advisable for complex jobs, stairs, or one-piece slate tables, as proper handling minimizes the risk of cracking or improper leveling.
Table of Contents
- How Do You Disassemble a Pool Table Before Reassembly?
- How Do You Reassemble a Pool Table Step by Step?
- What Tools and Materials Do You Need?
- How Precise Does Leveling and Torque Need to Be?
- When Should You Hire a Professional Instead?
- What Orange Movers Sees on Real Pool Table Jobs
- Why Precision Beats Speed on This Job
- Let Orange Movers Handle the Heavy Part
- Sources
- FAQ
How Do You Disassemble a Pool Table Before Reassembly?
Getting the table apart cleanly is what makes pool table reassembly fast instead of frustrating. Rushing this stage is the reason so many DIYers end up guessing which bolt goes where three days later.
- Remove the pockets first. Check whether they're stapled to the rail underside or held with screws. Staples pull out with a flathead screwdriver or staple puller; screwed pockets just need the right bit. Either way, set each pocket aside with its hardware in a labeled bag.
- Take off the rails. Rail bolts run through the apron into the frame. Loosen them evenly rather than removing one side completely before the other, since an uneven pull can crack old wood aprons.
- Pull the felt. Cloth is either stapled around the rail edges or glued directly to the slate. Stapled cloth peels off in one piece if you're patient; glued cloth often tears and needs replacing anyway, so don't stress over preserving it.
- Unbolt the slate. Three-piece slate sets are held to the frame with wood screws or bolts at each seam and corner. Remove every fastener before attempting to lift anything.
- Lift the slate with help. Never attempt this alone. A three-piece slate set commonly weighs 600 to 800 pounds total, split across three panels, and mishandling it during a move cracks the stone in roughly 30% of DIY jobs according to that same data.
Photograph every bolt pattern before you remove it. Bag hardware by section (rail bolts, pocket staples, slate screws) and label each bag with a marker. Lay moving blankets across the floor path before sliding slate panels, and use a slate jack or furniture dolly rather than dragging panels across bare floor or through doorways.
How Do You Reassemble a Pool Table Step by Step?
Reassembly reverses the disassembly order, but the sequence inside each stage matters more than most guides admit.
- Square the frame first. Before any slate goes down, measure both diagonals corner to corner. They should match within about 1/8 inch. A frame that's out of square will telegraph through every slate seam later, no matter how carefully you level afterward.
- Set the center slate. For three-piece sets, the center panel goes down first and becomes your reference point for everything else, since it anchors the alignment for the two end pieces.
- Position the end slates. Slide each end panel against the center piece, checking that the seams sit flush with no visible gap or overlap.
- Fill the seams with beeswax. Warm the wax with a heat gun, press it into the seam, let it cool, then scrape it flush with a putty knife or straightedge. Beeswax stays the field standard because it can be reworked if the slate needs splitting again for a future move, unlike auto-body filler, which cures permanently.
- Level between each step. Check level across the long rails, the diagonals, and directly over each seam. Shim under the frame, not the slate itself, and recheck after every adjustment.
- Attach rails and torque in a cross pattern. Hand-tighten every bolt first, then tighten in a star pattern (opposite corners, not side by side) before bringing each bolt to final torque. Tightening one bolt fully before the others twists the rail and causes dead cushions.
- Install the cloth from the center out. Staple or glue starting at the center of each rail and work toward the corners to avoid puckering.
- Roll-test the table. Roll a ball along several lines across the bed and watch for drift toward any pocket.
Pro Tip: Recheck level 24 to 48 hours after the final torque pass. Slight settlement in the frame or shims is normal, and catching it early beats replaying a warped table for years.
What Tools and Materials Do You Need?
A tight list beats a garage full of guesswork. Gather these before you start so a missing tool doesn't stall the job halfway through slate removal.
- Socket set and a click-type torque wrench for rail bolts
- A 4 to 8 foot carpenter's level, plus a digital or machinist level for precision seam checks
- A metal straightedge for verifying seam flatness
- Beeswax or a bonding agent, plus a heat gun to work it into seams
- A staple gun or contact cement for the cloth
- A pry bar and dead-blow mallet for stubborn joints
- Shims for frame leveling
- Slate jacks, moving blankets, and ratchet straps if you're renting equipment for the slate lift
- Gloves, eye protection, and permanent markers for labeling hardware
Buying or renting everything for a one-time DIY job typically runs $130 to $375, and the same source estimates the full job takes 8 to 12 hours spread across one to three days when done carefully.
How Precise Does Leveling and Torque Need to Be?
The frame has to be square before slate goes anywhere near it. A diagonal mismatch beyond about 1/8 inch guarantees uneven play later, even if the slate itself looks level once it's set down.
- Check the frame diagonals corner to corner before placing any slate panel.
- Level across both long rails, then across every seam, using a machinist or digital level rather than relying on a standard carpenter's level alone, since that upgrade catches deviations a bubble level misses.
- Scrape seams flush with a straightedge. A ridge too small to see with the naked eye is enough to alter how a rolling ball drifts.
- Torque rail bolts in a cross pattern to roughly 15 to 20 ft-lb using a click-type wrench, and never fully tighten one bolt before moving to its opposite corner.
Installers frequently note that the single biggest DIY mistake is rushing the leveling phase. Spending an extra half hour here is the cheapest insurance against years of a table that plays crooked. Once the rails are torqued, run a roll-test along several lines on the bed, then schedule a follow-up check within 48 hours, since minor settlement in the first two days is common even on a correctly assembled table.
When Should You Hire a Professional Instead?
Slate is heavy, brittle, and unforgiving of a single missed grip. Know your limits before the panels come off the frame.
- Never lift a slate panel with fewer than two people; a three-piece set's individual panels alone can weigh 200 pounds or more.
- Lay moving blankets across floors and doorway thresholds before sliding any panel, and wear gloves plus closed-toe shoes throughout.
- Hire a professional crew if the move involves stairs, narrow hallway turns, or a one-piece slate top, since DIY moves crack slate roughly 30% of the time and a one-piece slab often requires four or more people to move safely.
- Before booking anyone, ask about insurance coverage, whether they bring slate jacks or sliders, and whether a re-level visit is included if the table settles.
What Orange Movers Sees on Real Pool Table Jobs
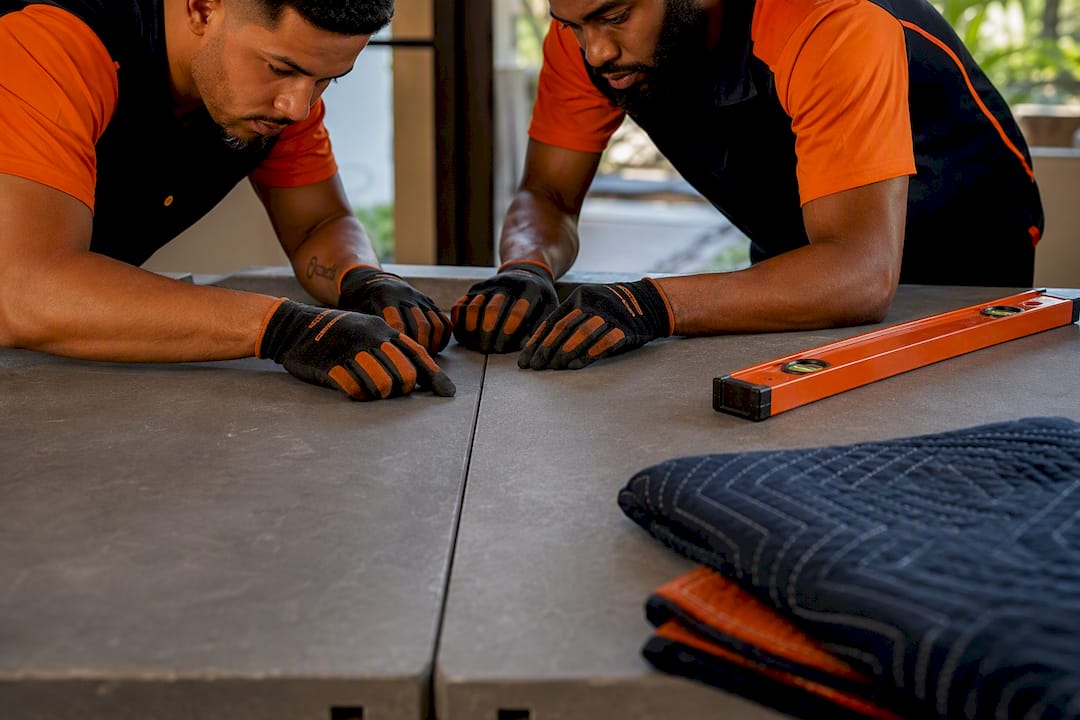
Professional moving crews handle pool table disassembly, transport, padding, and reassembly across Fort Lauderdale and the wider South Florida area. On most jobs, the failure point isn't the heavy lifting. It's leveling and seam work that got rushed the first time around. Stairs and tight turns add real time and risk to a job, which is why crews check access, slate configuration, and stair counts before ever touching a bolt. Expect a pro crew to ask about table size, number of slate pieces, and any tricky access points before quoting the job.
Why Precision Beats Speed on This Job
Most advice on pool table reassembly focuses on getting the table back together fast. That's backwards. The tables that play well for years aren't the ones assembled quickest. They're the ones where someone took the extra thirty minutes on diagonals, seams, and torque pattern before ever touching a cue.
The conventional wisdom oversells the difficulty of disassembly and undersells the precision reassembly demands. Taking a table apart is mostly patience and labeling. Putting it back together correctly requires a level, a torque wrench, and the discipline to recheck measurements you already checked twice.
If you take one thing from this guide, prioritize the frame square check and the seam scrape over anything else. A beautifully torqued rail on a warped frame still plays badly. A slightly imperfect torque pattern on a square, well-leveled slate bed still rolls true. Get the fundamentals right in that order, and the rest of the job is mostly following steps you've now read twice.
— Orange Movers Team
Let Orange Movers Handle the Heavy Part
Orange Movers gives South Florida homeowners a way to skip the slate-cracking risk entirely. Rather than renting a torque wrench and hoping the diagonal check goes well, our crews bring the slate jacks, moving blankets, and hardware experience needed to disassemble, transport, and reassemble your table correctly the first time.

Our teams also handle the padding and wrapping that keeps rails and slate protected during the drive, whether you're moving across Fort Lauderdale or relocating from Broward County into Palm Beach County. When you request a quote, have your table's size, slate piece count, and any stairs or tight hallways ready. That's the information that determines crew size and timing. If your move involves more than just the table, our full moving services cover everything from packing to long-distance transport. Reach out today for a quote and let an experienced crew take the leveling and torque work off your plate.
Sources
- How to assemble a pool table — Classic Home Billiards
- Pool Table Reassembly — Muscleman Elite (moving glossary)
- How much do pool tables weigh? — Pool Table Portfolio
- How to set up a pool table — Billiard Beast
FAQ
How Do You Disassemble and Reassemble a Pool Table?
Disassembly means removing pockets, rails, cloth, and slate fasteners in that order, then lifting slate panels with at least two helpers. Reassembly reverses that sequence, starting with a squared frame and the center slate panel before adding end pieces, filling seams, leveling, and torquing rails.
How Much Does It Cost to Disassemble and Reassemble a Pool Table?
A DIY job typically costs $130 to $375 in tools and consumables if you're buying or renting everything from scratch. Professional installers commonly complete the reassembly portion in 3 to 4 hours, which is often worth the cost given the roughly 30% slate-crack rate on unsupervised DIY moves.
Can You Assemble a Pool Table by Yourself?
Not safely, no. Slate panels in a three-piece set can weigh 600 to 800 pounds combined, and lifting or sliding a single panel alone risks cracking the stone or injuring yourself. Plan for at least one helper, ideally two.
How Long Does It Take to Put Together a Pool Table?
A careful DIY reassembly runs 8 to 12 hours spread across one to three days, mostly because leveling and seam work need patience rather than speed. Professional crews often complete the same reassembly in 3 to 4 hours because they arrive with the right tools and a practiced sequence.